


A simple line Follower
Sandwich is a fantastic robot that came about because I wanted a small uncomplicated line-following robot. Sweet! has been a very popular attraction on this website, but Sweet is too difficult to build and program for most hobbyists.
However, Sandwich is a robot you can make at home from scratch without a kit. Or, if you prefer, you can obtain a printed circuit board or a full kit for sake of convenience.
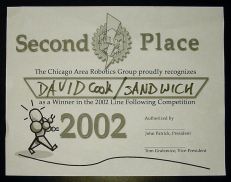
Sandwich won second place out of 14 robots at the Chicago line-following competition
Even though Sandwich is much simpler than Sweet, there are a number of concepts that carried over:
Sandwich actually exceeds Sweet in a few regards:
Then again, because Sandwich uses a comparator for brains, it doesn’t have some of the fancy capabilities permitted by Sweet’s microcontroller:
It wouldn’t be difficult to enhance Sandwich’s design by adding a small microcontroller and a few support circuits to provide Sweet’s features. Sandwich’s body, motors, connectors, and other elements could remain unchanged.

Three robots: Blue Sandwich (top left) with a printed circuit board; Red Sandwich (top right) with phototransistors, taller wheels, and a 6-volt battery pack; and the original Sandwich (bottom center) with point-to-point wiring and no headlight brightness adjustment
I’ve built four Sandwich robots so far. Three of them are pictured above (Sandwich, Blue Sandwich, and Red Sandwich) and one robot was given away (Green Sandwich). The robots are named for the color of the m&m’s mini mega candy tube that connects their motors together.

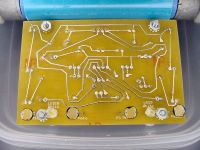
Left: Slightly messy point-to-point wiring. Right: Much cleaner and faster with a printed circuit board.
Sandwich (with a yellow tube) was the first of the series. The robot’s circuit was originally designed on a solderless breadboard then reproduced on a plain breadboard using #26 AWG standard wire to connect all of the components. Although point-to-point wiring is slightly messy and time consuming, it’s a common method for single-use creations or prototypes.
Since many of these robots were to be created for experimentation, I then took the time to design a printed circuit board. It’s a lot neater and ensures that the design can be recreated quickly and exactly by anyone. The circuit board layout is available on this site for owners of the book.

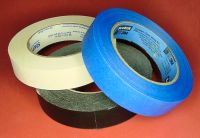
Left: Light, off, dark line-following toggle switch. Right: White, black, and blue masking tape.
With a flip of a switch, Sandwich can follow a path that is either lighter or darker than the background flooring. Obviously a black or a white line on the opposite color background is the easiest to follow. But, even an average shade of color, such as plain blue, can be followed so long as the background contrasts enough.
Painted lines (or existing patterns on the floor) work well. However, I find masking tape to be the most fun, since impromptu courses can be constructed and modified (and later removed) instantly.
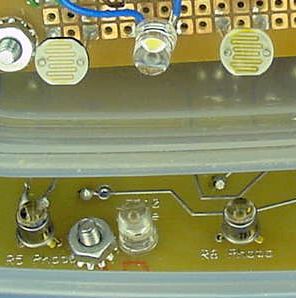
The standard Sandwich robot uses cadmium-sulfide (CdS) photoresistors (top). The Red Sandwich variation uses phototransistors (bottom).
Many line-following robots have difficulty tracking masking tape when the robot employs infrared LEDs and sensors. It seems most masking tape is to some extent transparent to infrared, thus the background “color” bleeds through and the robot can’t see the line.
To avoid that problem, Sandwich uses two pairs of ordinary cadmium-sulfide photoresistors. Also called photocells, they’re able to see visible light in the same ranges as the human eye. So, if you can see the line, the robot can too.
Unfortunately, CdS photoresistors react fairly slowly, which could hamper a robot that’s driving around on a fast track. As a test of improving Sandwich’s vision and speed, his brother, Red Sandwich, gained bigger wheels and visible-light phototransistors. Phototransistors react orders-of-magnitude faster, yet didn’t improve tracking whatsoever. (Later on, I discovered why.)

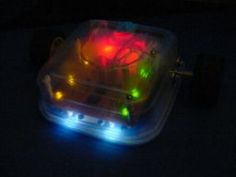
Left: White LED as a headlight between photoresistors. Right: Sandwich lit by eleven LEDs.
In any line-following robot, it’s important to overcome the shadows and ambient lighting that might cause the robot to mistakenly head towards a brighter or dimmer patch on the ground instead of the line it was supposed to follow. The easiest solution is to tuck the sensors beneath the robot (or under a front skirt) and to provide an exact amount of lighting with LEDs.
This gave me an excuse to use some white LEDs as headlights. By using white LEDs instead of just a single color, like red, the robot can follow different colors of tape equally proficiently.
Besides headlights, LEDs are used on Sandwich to indicate which side of the floor the robot thinks is brighter. The left and right sides of Sandwich flash on and off as it drives around the floor with the line centered underneath. This indication of what the robot is thinking really helped debugging.
Additionally, Sandwich has a bunch of LEDs stuffed into the center plastic m&m’s candy tube, lighting it up (fairly) evenly. It’s a gorgeous effect, especially at night. And since the robot has headlights, it can drive in total darkness.
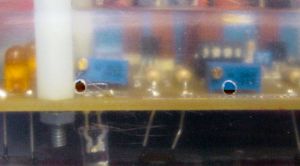
Tiny holes in the robot’s shell provide access to adjust trimpots
Robots that perform splendidly in the home laboratory (i.e. the basement) can be surprisingly finicky at the track on race day. Sandwich includes two trimpots (variable resistors) that can be adjusted through two tiny holes in the robot’s shell.
The first trimpot adjusts the brightness of the headlights and the second trimpot evens out the photoresistors so that they’re balanced. After assembly, the robot usually only needs to be adjusted once. However, if the robot is later outfitted with different wheels or different battery voltages, it’s beneficial to have these potentiometers to compensate.
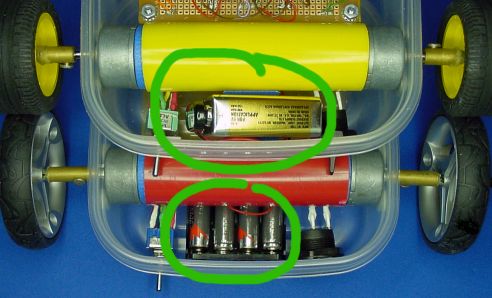
Sandwich uses a 9 V battery (top) where as Red Sandwich uses a 6 V battery pack
9 V batteries are excellent for most small robots due to the compact size of the battery and the connector. The only problem with 9 V batteries is their short running time, which is especially true of rechargeable varieties.
Red Sandwich swaps in a 6 V battery pack of four AAA alkaline cells. By picking a larger wheel diameter, the robot is able to compensate for the lower voltage and achieve the same overall speed. In this configuration, Red Sandwich is able to operate for much, much longer periods.

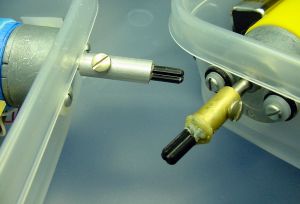
Left: Three different LEGO wheels. Right: Aluminum and brass couplers
I’ve always been a fan of LEGO wheels. They’re inexpensive, available in a wide variety of sizes and styles, and have one standard hub connection.
Almost all of my robots use LEGO wheels with a homemade coupler. The coupler can be made to fit different sizes of motor shafts. The other end of the coupler has a LEGO cross axle that permits nearly any LEGO wheel to be attached. This makes it quick and easy to experiment with different wheels. Also, the wheels can be pulled off, without tools, for storing or transporting the robot.

Motherboard connected to the robot’s body with Molex KK connectors
Another connector usually found on small robots (and other electronic projects) is the Molex KK. By attaching the robot body to the motherboard with press on connectors, the robot can be disassembled for maintenance, or even have parts swapped out, without desoldering or other difficulty. In fact, this whole robot can be separated into pieces in minutes.
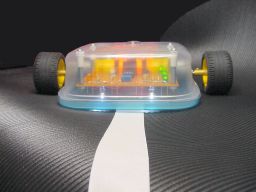
Front view of Sandwich following a white masking-tape line
For such a pea brain, Sandwich does a great job of following lines. The robot never strays off the path, so long as a reasonable contrast between the line and the floor is chosen, and so long as the turns aren’t cruelly sharp. Basically, after a decent course has been established, the robot will zip around endlessly, until the battery final gives out.

(Click the picture above to see a movie of Sandwich racing)
Just for fun, my son and I set up this course.
If you want to build this robot, you can find complete step-by-step instructions, as well as schematics, wiring diagrams, part numbers, and part suppliers in the book, Robot Building for Beginners.
Many, many readers have created their own Sandwich robots. You can, too!