

Previously, we saw how infrared passes through thin plastic by using a remote control. That’s a shame, because mass-produced injection-molded parts (balls, eggs, etc) are inexpensive and lightweight, which makes them appealing for robot contests. But, that’s not important if the robot can’t see them.
Can the parts be painted to prevent IR penetration?
There is a huge variety of plastic formulations available in products today. Many types of plastic are paintable, such as PVC, acrylic, ABS, styrene, polyester, polyurethane, and polycarbonate. I figure, if it is glueable, it is paintable.
But, there are just as many major types of plastics that are not paintable, such as nylon, Delrin/acetal, Teflon, polyethylene, and polypropylene. If it is soft, flexible, oily, or slippery, it isn’t easily painted. If the plastic is recommended for gears, bearings, or glides or is “self lubricating”, that’s a clue that it is low friction and therefore isn’t paintable.
There are industrial techniques, such as chemical etching, that can permit paint to be applied to almost any plastic, but that’s beyond the average hobbyist. For this article, I’m going to stick with the classic painting methodology and paintable types of plastics.

Crackable plastic can be painted. Flexible plastic cannot.
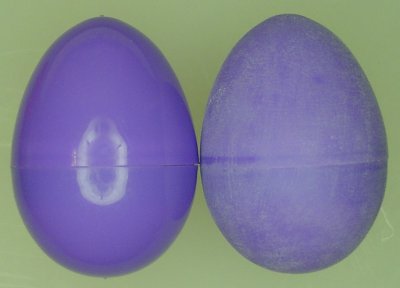
Years ago, Easter eggs (hollow plastic egg shells) came in two separate halves and they shattered into shards when you stepped on them. Nowadays, most of the plastic eggs have a connecting hinge and are squishy to be shatter resistant.
It is likely that the old eggs were ABS or polystyrene and the new eggs are polyethylene or polypropylene. It would be almost impossible to get paint to stick to an oily, flexible surface. So, I selected a bag of rigid two-part crackable plastic eggs for the painting experiment.
Molds are usually coated with slippery release agents to prevent the plastic from sticking to the molds. Oils need to be removed from the plastic surface before sanding, otherwise the oils will be redistributed and embedded into the scratches we intend to hold onto the paint. Wash the plastic objects with a household degreaser or detergent.
For maximum paint adhesion, sand and wash plastic to remove oils and to provide a rougher surface.
Next, the surface needs to be roughened to increase the bondable surface area and to allow for some mechanical fastening. Sand with a fine grit paper -- 400 should be good. If the sandpaper is creating deep visible scratches, switch to a finer-grit sandpaper.
Finally, wash away all of the plastic dust and exposed oils with detergent and water. Rinse with plain water and allow the plastic to dry.
Some readers will think this is too much work and will skip all of these steps. Most of the paint won’t adhere. It will peel right off.
Painting round, lightweight objects is like chasing geese (so I’ve been told). They run away from the spray paint can.
Since the eggs can be opened, one approach is to:
The weights keep the eggs from flopping around too much during the bursts of spray paint.
That approach sounds like a lot of work. And, I didn’t really want holes in the eggs.

A makeshift painter’s box is made from cardboard pieces and brown Kraft paper. Plastic eggs are gently secured with low-adhesion painter’s masking tape.
Using various cardboard panels, I taped together a wide painter’s box. The bottom is lined with brown paper (Kraft paper or craft paper). The washed and sanded eggs are taped to the Kraft paper using blue masking tape that is mostly flipped over with the sticky side on top. Painter’s tape is low-adhesion and won’t pull the freshly dried paint off the eggs when they are repositioned.
This approach is fairly fast but it means only one side of the plastic egg can be painted per pass. Since I intended to make multiple light passes, this wasn’t a huge ordeal.
In the Case Western robotic egg hunt, black painted eggs are worth -10 points to discourage robots from blindly collecting all eggs en masse. A more intelligent robot can detect and avoid the black eggs, or, better still, the robot can carry black eggs to the opponents nest to decrease the opponent’s score. This is an interesting scoring twist that results in a variety of strategies.
Recall that a glossy surface can reflect enough light to be detected by reflective sensors. If the black eggs are painted with a glossy paint, it will be difficult for a robot to tell the glossy black eggs from the glossy colored eggs.
Instead, if the black eggs are painted with a flat black surface, then photo-reflective sensors will not detect the black eggs but photo-interrupter sensors will. By using multiple sensor arrangements on the same robot, it should be possible to distinguish between a glossy colored egg, a flat black egg, and no egg.
I wanted to use a paint specifically designed for plastic. Unfortunately, at the time, I couldn’t locate a flat black spray paint for plastic -- only glossy black. So, I used a standard flat black spray paint, rather than a "plastic fusion" version.
Many people prefer to start with a primer. Primer is not designed for attractiveness or color -- primer is designed to stick to the surface and to obscure underlying coloring. Furthermore, the primer provides an engineered surface for the top-coat paint.
Besides proper surface prep work, the secret to painting is multiple thin passes. The randomness of each pass prevents unevenness and the thin coats avoid drips due to too much paint pooling in a spot. Thin coats dry quickly and thoroughly. And, multiple layers of paint resist chipping all the way through.
Multiple passes also allow you to gently sand between passes with ultrafine sandpaper (800-1000 grit). This removes any paint that did not adhere well, giving you a chance to try again on any weak spots. Wash and dry after sanding.
On the surface, the final painted eggs looked great! The paint adhered well to the plastic. It doesn’t peel off when the egg is compressed and it doesn’t scratch off easily.
Most importantly, the infrared track-timer sensors detect the black egg in a photo-interrupter arrangement but not in a photo-reflective arrangement (unless the sensors are placed really near the shell). That’s what I want.

An apparently even paint job shows plenty of pinholes when illuminated from inside.
Unfortunately, what appeared to be excellent coverage was in fact quite bad. When lit with a remote control or a flashlight, it becomes obvious that the paint job suffers from lots of pinholes and thin spots.
What went wrong?
The next time I paint something plastic, I will experiment with some different techniques and post my results.