

The previous page described an example of a salvageable consumer appliance, a cordless phone with a dead battery pack. A replacement battery pack was assembled from AAA rechargeable batteries and successfully tested. However, the wiring was connected with masking tape. I decided it was worth trying to solder the cells together for a more permanent and reliable solution.
See the caution on the previous page. Soldering batteries could result in harm even if you are careful.
Besides safety glasses, there is one must-have tool for soldering batteries together. You must use a high powered heat source: a solder gun. Read that again: “solder gun” not “soldering iron”, not “welder”, and not “propane torch”.

Weller soldering gun
The problem with soldering irons is they don’t deliver enough energy to heat the joint quickly. You want to avoid heating up the chemicals inside the battery - which might be damaged or explode. If you’ve ever struggled to solder a thick circuit board trace or TO220 package with a soldering iron, you’ll understand the problem. The heat conducts away almost as fast as it can be delivered, resulting in an overheated board or component and an underheated solder joint.
If the solder isn’t melted by the count of two, then something is wrong.
Because of the risk of fire, chemical release, and explosion, you must use eye protection and perform the work with adequate ventilation. A face shield and gloves are recommended.
The first step in soldering batteries is to prepare the terminals. They must be clean and free from debris. Numerous people recommend lightly sanding the metal to remove thick oxidation. I used new 400 grit sandpaper. This is followed by cleaning the terminal with isopropyl alcohol or electrical contact cleaner to remove sanding dust and oils deposited by fingers or manufacturing.
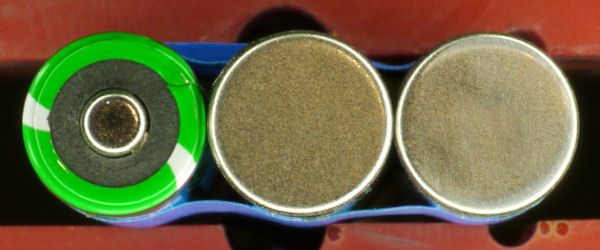
Middle cell is not sanded. Right cell is sanded and cleaned.
One of my concerns with the official arrangement of the AT&T phone battery pack is that two large terminals sit beside each other - potentially making electrical contact. In the above photograph, it is clear the ends do not quite make electrical contact as there is some side insulation between them. Nevertheless, I applied electrical tape between them and over them after soldering completed.
The next step is to strip the ends from an insulated wire. The wire should be of sufficient gauge for the energy it will carry. This is more of an issue with RC battery packs where the motors draw significant current.
The usual rule is that the wire should be mechanically connected and that the solder should only be used for electrical connectivity. That is, solder should not be what is holding the wire in place. In this case, I don’t seem to have a choice but to rely on the solder for a physical connection.
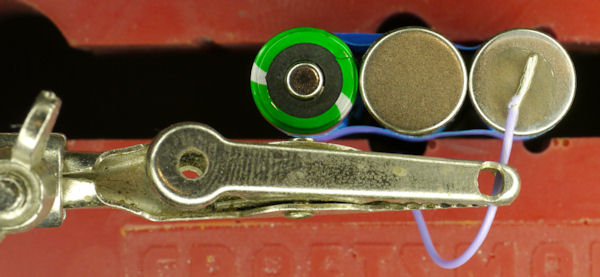
Battery with stripped wire, flux, and grody helping-hand alligator clip
A dab of no-clean flux (MG Chemicals 835-100ML) is applied to the battery terminal and wire. The flux will remove oxidation and improve solder flow. Do not use acid flux on electronics. Acid flux and any cleaning-required flux that is not cleaned according to the manufacturer’s requirements will eventually corrode the metal and result in damage.
A helping-hand alligator clip holds the wire in position during soldering.
The soldering gun is brought up to temperature and the tip is tinned with solder. When the solder gun is fully heated, touch the soldering tip to the battery terminal and wire while simultaneously touching the solder to the terminal and wire. The solder should melt instantly and form a shiny, flattened (but slightly curved) blob.
If it takes more than two seconds, then something is wrong. Withdraw and let it cool. Then determine if sufficient contact was not being made or whether the gun wasn’t hot enough. Try again.

Bottom of battery after soldering
Not bad. I carefully inspected the joint for good adhesion and tugged on it to be sure. I also inspected the cells to be sure there was no visible damage, no changes in shape, and no discoloration or leakage.
After soldering the wires, I applied electrical tape. The new AAA cells fit snuggly in the original plastic shell. The output was tested with a multimeter to ensure the same voltage and polarity as before soldering.
The new battery pack fits inside the phone as well as the old pack did. I would be concerned if it were loose or overly tight.
The handset powered up perfectly. Test phone calls and shaking the handset showed no issues.
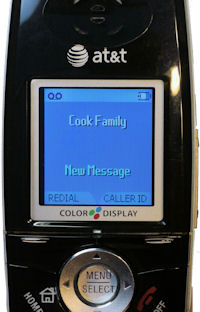
Phone working with soldered consumer AAA battery pack
For the first couple of days, I kept watch on the new battery pack when the handset was charged in the base. Unfortunately, the base’s “CHARGE” LED indicator doesn’t seem to differentiate between a properly inserted handset and when it is actually charging.
After an hour of charging, I pulled the handset and checked the battery pack. It wasn’t even warm (that’s good). It was fully charged at 4.3 volts (a little over 1.4 volts per cell).
Double check your work and be prepared to abandon your homemade battery pack if:
I feel good about trying a new experience and saving the planet from another discarded appliance. I would be willing to perform this same operation on another electric device in our home under similar circumstances.