(continued from previous page)
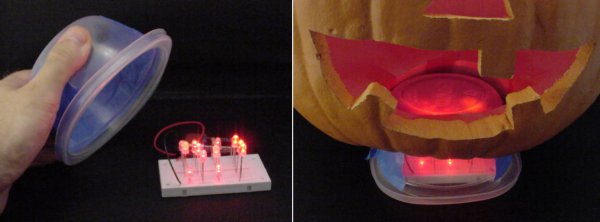
The model pumpkin used in this article is an artificial Funkin. The bottom of the Funkin is open. That’s where we'll put the LED light source.

Using a small plastic container to hold the LED light source under an artificial pumpkin.
A Glad Products container, 1 3/4 cup (14 oz, 414 ml) fits perfectly over the 9V battery and solderless breadboard. The pumpkin is placed over the small container.
To block the light from showing underneath the pumpkin, you can cover the sides of the plastic storage container with blue masking tape. Then, wrap a towel or pillowcase around the small container, as though the jack-o-lantern were wearing a scarf.
For a real pumpkin, you can either use this method, or you can throw the circuit board and alkaline battery into a Ziploc sandwich bag and place it on the bottom of the pumpkin. When you’re happy with the look of the pumpkin, you should trim the leads of the LEDs and resistors to sit flush against the prototype board. Otherwise, the individual LEDs will be noticeable in the pumpkin’s mouth.


Above: Pumpkins lit with red LEDs and pink LEDs.
For red, I used four strands of three red LEDs. Total of 12 red LEDs.
For pink, I used four strands of two pink LEDs. Total of 8 pink LEDs.


These green LEDs are a little too yellow for my taste. The white LEDs look good.


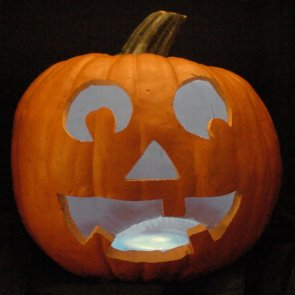
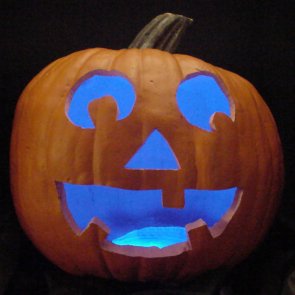
Two pumpkins lit with aqua LEDs and blue LEDs. The blue LED light is striking.


The purple LEDs look similar to the pink LEDs.
The ultra-violet LEDs appear dim because human eyes can’t see very far beyond blue. I wonder whether a natural pumpkin will fluoresce?
There is a health concern about staring directly into an ultraviolet LED. The total UV exposure probably wouldn’t be as great (and the wavelength isn’t as energetic) as you would get from natural sunlight. However, your pupils may not contract and you may not blink or squint like you would if you were staring at a more visible light source. Temporary indirect exposure to a group of UV LEDs lighting up a pumpkin is unlikely to cause any more harm than would a blacklight. But, if you’re concerned, or if you plan to leave the pumpkin unattended around children or incapacitated adults, avoid using a UV LED.
All of the LEDs used for lighting up these pumpkins are modern, high-brightness LEDs in clear cases. These types of LEDs are also called ultra bright LEDs, high efficiency LEDs, or super bright LEDs.
Older LEDs tend to be much dimmer and are in tinted cases. Using lower resistor values would make them brighter, but they’ll burn out.
I’m not sure what to do with my old LEDs. But, they’re not appropriate for this project.
For color, size, and output consistency, I usually want my LEDs to be the same part number from the same batch. But when I clean up the robot room, I’m sometimes left with piles of unmarked LEDs. I can use the LED Tester to quickly determine the LED’s color and brightness, but I can never be sure which exact part number the lone LED matches.
Fortunately, since the emitted light tends to blend inside of a pumpkin, this is a good chance to use leftovers or unknown part numbers (but not junky dim LEDs). Slight variations in color or output will go unnoticed.
You can come up with other color variations by combining LEDs of totally different colors on the same board. For example, by using strands of red and blue LEDs, you can end up with a nice purple or pink color overall. White and blue LEDs combine to make a sky blue light source.
By mixing up popular or primary colors, you don’t need to buy individual specialty LEDs like pink, purple, or aqua.
Now, that we’ve mastered lighting up a jack-o-lantern, can we make LED flickering candles by using blinking LEDs? A movie is coming up...